Showing posts with label 15mm. Show all posts

Tuesday, October 18, 2016

A New Post, from England!

Well here I am in England, finally updating my wargaming blog! Almost 6 months to the day since my last update. The gaming club I play at here is incredible, and I've been splitting my time between Infinity, Warhammer 40k (Using the Heralds of Ruin Kill Team rules, check them out), and just recently Napoleon at War.

So! Here's an update on my current projects!

Armageddon Steel Legion special weapon conversions. GW only made a Grenade Launcher and a Plasma Gun model, so I've converted a couple lasguns into flamers, and carved a couple away entirely to replace with another flamer and a melta gun.

Also, a Company standard bearer! I didn't take a close up of his right arm, but it's from the Cadian command set, I pared away  most of the shoulder pad and filed it down to it Should look just like his normal cloth arm when painted. I'm not good enough to make it look like he's got a heavy glove on his bare hand though, sadly.


All set to burninate some Orks and/or other things

'Need a light?'

In other news, here are some French, marvelously well painted by the magnificent Stuart, and given over to me to command this past Sunday as we did battle against the perfidious Russians and English.

Unconventionally, we had our infantry on the flanks and Cavalry in the center.

My troops begin to shake out of column and into line as we face the brunt of, not only the Russian infantry, but the thunderous fire of their massed artillery battery.

In the center, our cavalry regiments took turns charging and then bouncing off of each other, until they were finally worn away to nothing.

Here, the french Right flank. The woods were thick with English riflemen, and the bayonet played as much a part of the fight as the musket. Other than the sharp engagement in the woods, his troops didn't play much part, other than to keep three battalions of Scottish Highlanders pinned on the hill. 

A close up of Stuart's fantastically, infuriatingly well painted French line infantry. I mean, goddamn look at those! Fantastic. I'm not half jealous.

And here, my own troops in progress, some Austrians.

They'll look better with some washes on the faces, and once they're fully based.

Sunday, December 6, 2015

Flames of War- The Battle for Caen Continues

 Last Sunday, my friend Evan and I played another game of Flames of War for the ongoing Firestorm: Caen campaign, detailing the British/Canadian half of the Normandy invasion. My grenadiers, along with their kameraden from the 2nd Panzer and 12th SS Panzer divisions, strove valiantly to hold back the British onslaught from Juno Beach. This is the third campaign turn, and... I feel like Evan won both of the previous games? I don't really remember, truth be told. I know he won one of them 5-4, a narrow victory, which was his same result this time.

I've been playing against Adam and his Paratroopers from the British 6th Airborne, and we've been taking turns royally stomping each other of late. First, he thoroughly trounced me, and the following game was trounced in turn, with the victor scoring 6 points to the loser's 1. My loss is documented in an earlier post, while my victory was un-photographed, since we played with shoddy, makeshift terrain. Anyway, here's the battle.


Game 2: Attack from Juno Beach
Allied forces on Juno Beach have been successfully landing for days. As reinforcements pour in, the Allies launch an offensive into Bretteville L'orgueilleuse (B-3). The Canadian forces tasked for this mission are eager to prove they are the equal of any Commonwealth troops. In their way, the 12th SS Panzer Division has deployed a company of Panzer IVs. The Allies must contest with stiff German resistance and the natural fortifications of the dense bocage hedgerows. Can the Germans hold their objectives long enough to thwart the Allied attack?
*Note-This matchup is pretty tough for the Germans. Make sure both players are okay playing with the unbalanced troops. You can modify the FS troops to create equal forces if you prefer.

Mission: Fighting Withdrawal
Attacker: As per mission
Terrain: Bocage
Allied Firestorm Troops: 3 Candian Infantry Infantry Division-CT Rifle platoon with Command Rifle/MG, 6 Rifle/MG teams, 1 Piat team, 1 light mortar (all have sticky bombs) (Canadian) (or 100 points)
AND
2 Canadian Armoured Division-CT 2 Shermans and 1 Firefly (Canadian) (or 200 points)
AND!
Limited Air Support Typhoons (or 150 points)

German Firestorm Troops:
12 SS Panzer IVs-3 FV Panzer IVs (or 250 points)
AND
2 CT StugG or StugIV (or 100 points)


My army. Three platoons of Grenadiers, two platoons of MG-42s, 3x Panzer IVs, 3x Fearless Veteran Panzer IVs (12th SS Panzer, free firestorm troops), 2x StuGs (2nd Panzer Division, free Firestorm troops for this turn,) 3x StuGs, some PaK anti-tank guns, some 7.5cm infantry cannons, a platoon of mortars... I think that was it, I'm writing this a week late. 

Evan's Englishmen. Or, should I say, his Scots. A platoon of Churchill tanks (and they're right bastards, let me tell you!), two platoons of Shermans with Firefly tanks (One of them was a free Firestorm unit, I believe), a 25lbr battery, another smaller caliber cannon battery, three infantry platoons (and he's been working on painting, hurrah!), mortars and air support. (Plane not to scale, (and technically German) but it was lying around the shop, so what the heck, we used it.)

The scenario was Fighting Withdrawl. All forces start on the table, but at a certain point I have to being withdrawing troops. The objectives are the two purple tokes and one white token above. At a certain point, I think turn 5 or 6, I get to remove one a turn. Evan wins if he starts a turn holding an objective. This lets me sneak them out from under him, if he takes too long to get there. Of course, my challenge is that starting in turn 3, I have to start removing platoons from the board.

Another view of the board, with the objective village in the lower right hand corner.

With my PaK anti-tank guns hidden in ambush (off the table), my Infantry platoons dig in, a strong, in-depth defence being the plan, with my two infantry cannons dug in on the hill overlooking the road Evan's tanks are sure to come down...

My 7.5cm infantry guns. There's some long abbreviation for them, but they're not PaKs, just. small cannons. 

And they wreak a fearsome toll on the allied tanks as they advance on the dug in German infantry!

Smoke billows from knocked out tanks, and a big yellow chip means that the platoon commander has bailed out of his beleaguered tank, discretion being the better part of valor.

... Just as my Own tanks run in to a spot of bother, their elite SS crews scrambling to escape as their entire platoon is wiped out by some Canadian Shermans on my right flank (Evan's left)

A pointless close up of my infantry in the village, the knocked out Shermans billowing smoke in the distance.

The Brae Scots advance on the village, even though well-sited MG-42s and supporting StuG assault guns force them to pay a high price for every yard they take.

I admit my picture taking got pretty spotty as we went, since things heated up and left no time for photography, in the midst of battle. My right flank collapsed under the hammer blows of the Churchills and Shermans, even as my PaK guns revealed themselves in the woods and blew a Churchill to pieces.

Evan's air support also did a good job, knocking out several StuGs and pinning down my troops time and time again over the course of the game.

In the end, the objectives didn't matter, since after several hours of intense fighting, the courage of the Germans broke first, and they were forced to flee the field, leaving it in the hands of the battered Scots. Since I'd destroyed a sizeable portion of Evan's force, the victory points totaled out at 5 to 4.

For more on this campaign, check out http://rustandthecity.blogspot.ca/


Sunday, November 15, 2015

The Battle for Bayeux

The nice crew at Rust and the City blog have been running a Firestorm Caen campaign for Flames of War, which is in effect the British/Canadian half of the Normandy campaign. I finally took pictures of our 2nd turn game, my German Grenadier company (just basic infantry) against Adam's British Paratroopers.

http://rustandthecity.blogspot.com/2015/11/firestorm-caen-turn-2a.html

He scored 6 victory points to my 1, since I didn't wipe out any of his platoons, and that's how VP is scored, grumble grumble. We stumbled several times with the rules, since we really are still re-learning it all, but we ended up with a legitimate result, and the next game should go a lot faster, haha.

My army: 3 platoons of grenadiers, a mortar platoon, an MG42 platoon (which I attached to two of the Grenadier platoons) (And I split my 3 platoons into 4, using the Kampfgruppe rules lets you take the company 2iC and group portions of other platoons into a separate platoon), a PaK Anti-Tank gun platoon, some Infantry Guns (my bare-silver ones there), 2x 4 Panzer IV tanks, and 2 Panthers.


With 'Delayed Reserves,' half your army starts on the table, and the other half in reserves, and they don't start showing up until turn 3 (if you're LUCKY. I only got one reserve unit to arrive before the end of the game, and they weren't enough to turn the tide.)

Adam's unpainted Paratroopers. We started playing years ago, but let it all lie fallow for ages. We just got back into it very recently, so some of our stuff is unpainted. Please don't judge us too harshly.

View from the German deployment corner

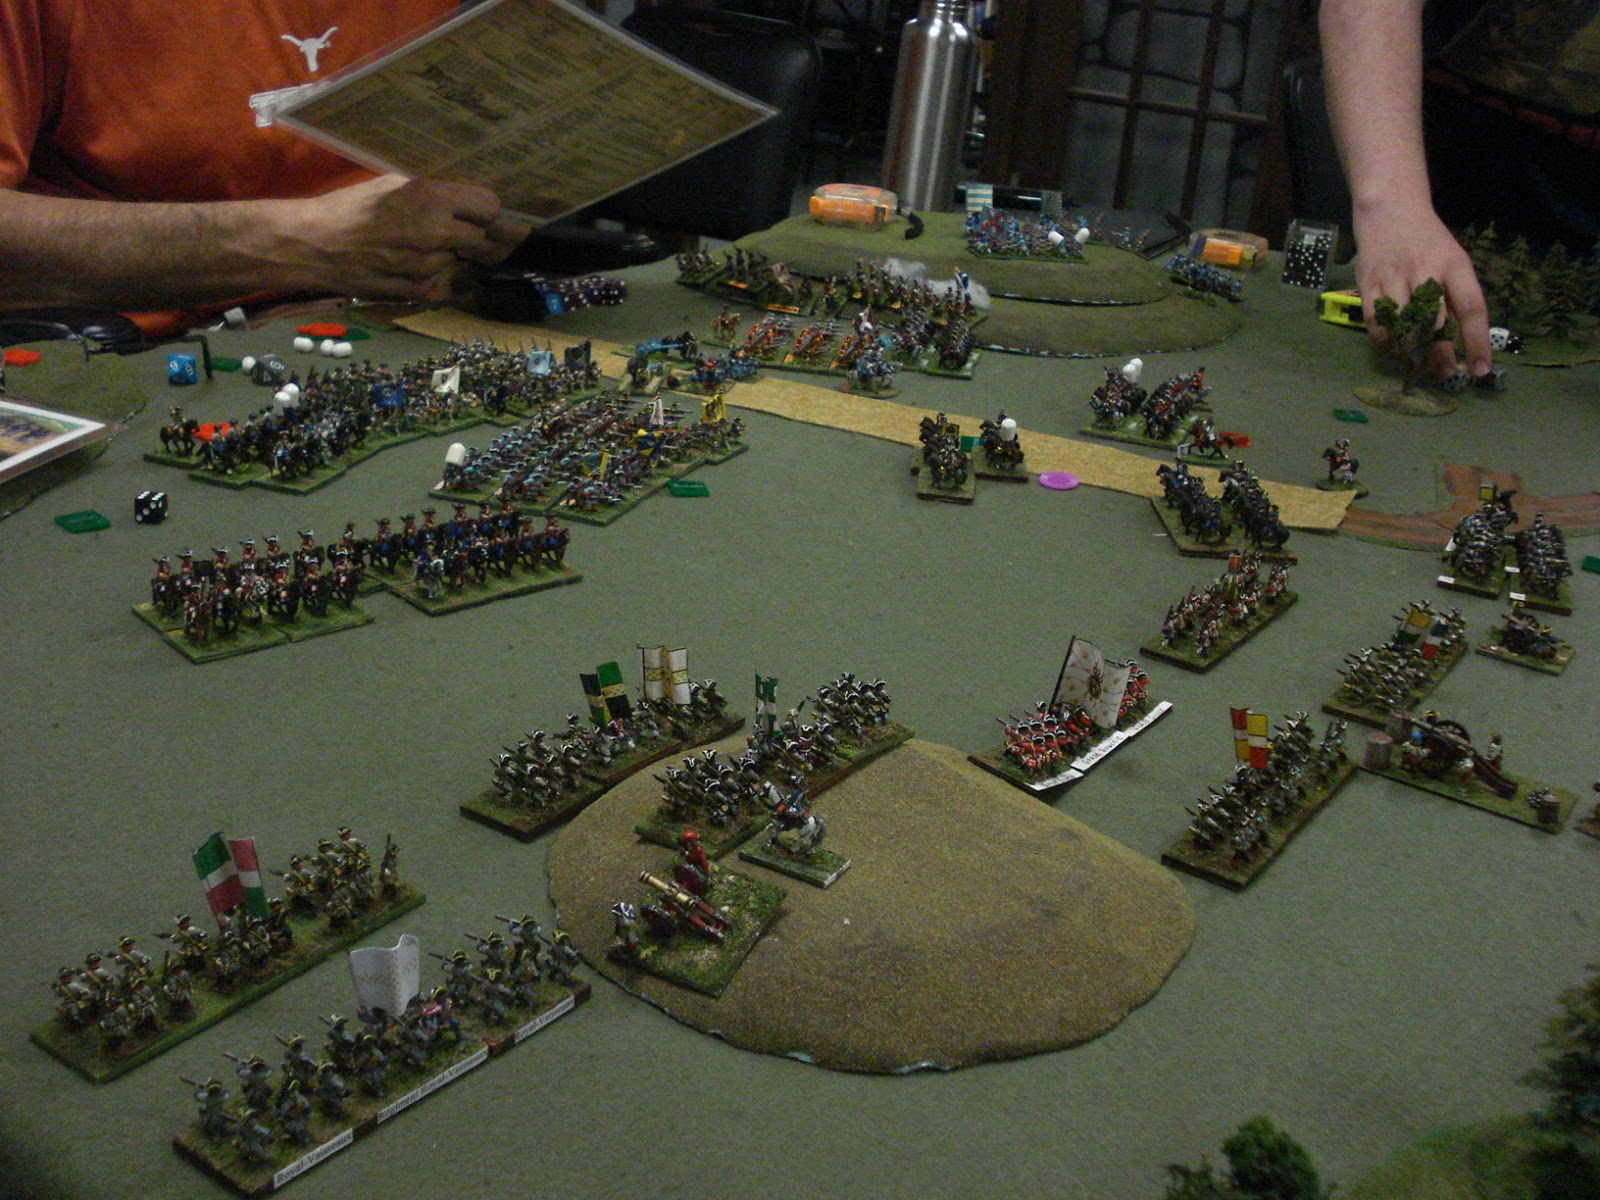
View from the British deployment corner.

Turn 1, the Germans begin to spread out, with a strengthened platoon and the Panzer IVs moving to engage the enemy, while the 2nd platoon of infantry moves towards the woods to cover that flank.


My mortar platoon prepares to give covering fire as my 2nd Grenadier platoon advances to cover our exposed flank. The scenario has the enemy start in the opposite table corner, but their reinforcements arrive on the other side of the long table edge, so directly opposite the village I started in, instead of further away, hence the need to guard against a flanking maneuver. 

My bold Panzer IVs managed to knock out one of the British Cromwells at range, sending the survivors scurrying around the hill, out of the line of fire.

Adam's deployment, with a platoon of Paras behind the woods and holding the objective, some anti-tank guns ready to blast anything that clears the edge of the woods, mortars right by the farmhouse, and his tanks there on his left flank, on the other side of the dirt road.

With no nearby tanks to contend with, I use my Panzer IVs against the Paras in the woods, killing several with massed vehicle machine gun fire, before they assaulted and massacred the Panzer IVs. In my game with Evan last week, we didn't have any assaults, so I was woefully unprepared for how murderous Fearless Veteran infantry are in close combat, especially Paratroopers with their gammon bombs and PIAT teams. By the end, Adam had three bases left, two from the platoon and one the Company CO, but I was all out of tanks, and my reinforcements were not forthcoming.

Bearded giant! 100 metres, front!

No, but those yellow chips are my objectives, which Adam has to take to win. He did. My AT guns lost 2/3 of their number to his tanks, which swept around the hill and rolled absurdly well. The survivors decided to flee back to Dusseldorf rather than guard the objective.


With his tanks sitting on my objective, my only hope left was to drive them off, giving me more time to bring on reserves. He has to Start the turn in control of the objective, so I had a chance. But my Panzerschreck team, the only survivor of that large infantry platoon, fled at the start of my turn.

I guess I don't have any pictures of their action, but that platoon did some decent work, advancing on the enemy and taking constant fire from mortars AND anti-tank cannon the whole time, but were outflanked by the tanks once my PaK guns fled and left them unsupported.

But finally, my first reserves arrived on turn 5(!) I chose my two Panther tanks, the most powerful and meanest medium tanks of the war. If I could destroy two of his tanks, his last might very well flee, and save my skin for another few turns.

But alas, it was not to be. Both shots missed, and Adam won the game. With no platoons lost, he scored 6 victory points to my 1. I'm only a little salty about the results, I just wish more of our armies had gotten table time. He didn't get any reserves at all, and I only got a single platoon, leaving like 2/5 of my points completely un-used.

Still, I had an absolute blast, and I'm looking forward to playing again. I'm ready for some big, pitched battles where I can bring more of my force to bear against the foe.

Monday, September 14, 2015

A Birthday Battle of Beneath the Lily Banners

The day after my birthday, I made the trek to Austin for a game of Beneath the Lily Banners with the Great Hall Games crew, and my best friend Evan. I'd cooked up the scenario a week ago, and Lance thought it sounded solid. The outnumbered Franco-Bavarian army, through superior generalship and daring maneuver, had managed to catch the Dutch and their British lackeys before their armies could combine. Stronger than either individual force, but weaker overall, the French left a token force (commanded by me) in place to pin the first army down (Randy), while the majority of the French and their Bavarian battle buddies (Evan and Wayne) moved to crush the reinforcements rushing to aid their beleaguered friends (Commanded by Lance and Biff, though Lance was called away before the game even started, due to a family emergency. All thanks to Lance, for lending us his beautiful minis to use, and we wish his wife a speedy recovery.)

Wayne, in the colorful shirt, commanded the French infantry and artillery. Evan, bottom right, only arms visible, commanded the French Cavalry and Bavarian infantry.

The French main force.

Lance/Biff's troops, British and some German minor principality forces, realize that They are our main target, not Randy's army.

The aforementioned Randy's army, at the other end of the board.
He formed his cavalry on his right flank, and split his infantry to march around the woods.

Close up on some British infantry, because damn that's a good paint job.

My blocking force facing Randy's army consisted of 4 battalions of Infantry, three regiments of Cuirassiers (seen above), 2 of Dragoons, and one of Bavarian Hussars (worthless).
When I initiated my cavalry charge, I rolled quite poorly, and 2/3 of my Cuirassier shock cavalry went from good order to 'Shaken,' halving their close combat dice and getting them utterly slaughtered right off the bat.

A few turns in, and my casualties are really starting to add up. The French line infantry (seen to the right of the photo) kept barely hanging on, slowly getting whittled down by the English and Dutch foes.

The British cavalry cuts through the French Dragoons like a hot knife through butter, and move towards the village anchoring my left flank.

A view from the British side of the river. All my infantry had, by this point, lost at least a third of their effective strength. But their job was to hold the enemy long enough to crush the Other allied force...

Which was going rather well. Evan's good dice rolls and natural cavalry elan made short work of his English/whatever foes, driving them back and slicing deep into the infantry columns behind them. Meanwhile, his Bavarian infantry summitted the hilltop and began to deploy into line, while the beleaguered allied army rushed a few infantry battalions uphill to meet them.

Here you can see Biff's infantry attacking the Bavarians atop the hill, while the French cavalry (right) pushes deeper into enemy lines.


Meanwhile, on Ben's end of the table, the British push into the village and my remaining forces begin to withdraw. But help was coming! A full brigade of fresh French forces had turned from the attack to help shore up my failing lines. (See the road, leading away from the village)

Evan's Bavarians making short work of their foes, begin turning the enemy flank.

Since the store was close to closing, we decided that night had begun to fall, ending the day's battle. I'm pretty sure we ruled that Biff's army had taken a severe pounding, and was in danger of being overrun. However, the holding force had taken far greater casualties than had been hoped, though they weren't wiped out. Overall, I think a tactical victory for the French, though not the overwhelming strategic win we'd been hoping for.

Maybe the next time we play, we can pick this up again sort of where we left off, determine what forces remain, how many reinforcements the depleted units would have gained, and see if the French can survive the counter-attack of both forces? Or maybe the partially mangled French army drives Biff's troops into route, but then has to turn and face the nearly un-touched Anglo-Dutch army under Randy's command?